
Filter rules let you define exactly which records SchoolDay syncs. Without a filter rule, SchoolDay syncs all available records for all entity types.
-
SIS (import) app. Limit what SchoolDay pulls from your Student Information System. For example, import only active students or only classes from specific grade levels.
-
Vendor (export) app. Limit what SchoolDay shares with a vendor. For example, export only classes for a specific subject or only students at schools that have a license for that app.
Before you begin, see About filter rules to understand entity types, filter fields, Include linked, and AND/OR logic.
Requirements
- Primary District Admin permissions
- An application must already be activated and connected
Configure a filter rule
- In SchoolDay Connect, select the application you want to apply the filter rule to.
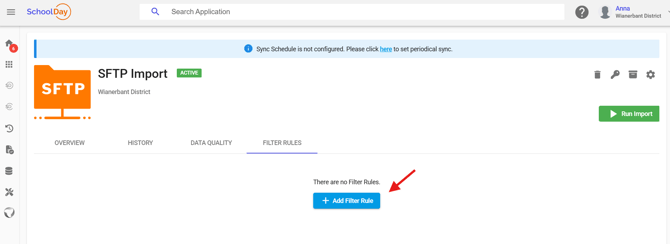
- Go to the Filter Rules tab or click the gear icon on the top-right > Filter Rules.
- Click Add Filter Rule. The configuration panel opens.
- Select the entity type you want to filter.
- Select a template from the list.
- Templates are pre-built attribute combinations for the most common filtering needs for that entity. For example, select Enrollment Status to filter by active/inactive students. If no template fits your use case, select Custom Filter by to choose attributes manually.
- Complete the filter fields in the parameters panel:
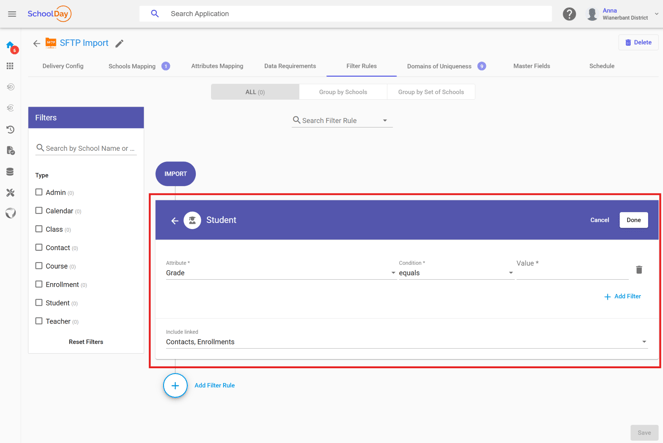
- Attribute: The data field to filter on (e.g., grade, status, or school).
- Condition: The comparison operator (e.g., equals, contains, or is not).
- Value: The specific value to match (e.g., active, 9, or Lincoln High).
- Include linked: The related entity types to carry over when this rule matches. For example, if you filter students by grade, enable Include linked for class to also sync only the classes those students are enrolled in.
- To filter by more than one attribute, click Add filter and repeat step 6.
- Note: Multiple conditions within the same rule are evaluated as AND — every condition must match for a record to be included.
- Click Done to close the parameters panel.
- Important: Clicking Done only closes the panel. The rule is not saved yet.
- Click Save to apply the rule to the app.
- To add another rule for the same or a different entity type, click Add Filter Rule again and repeat from step 6.
- Note: Multiple rules use OR logic — a record is included if it matches any one active rule.
Other ways to control vendor data sharing (Export apps only)
In addition to filter rules, you can manage vendor data access using Request Changes. This lets a vendor request a specific data subset directly, which you then review and approve. See Approving sharing requests from vendors.
Verify the configuration
After saving, confirm the rule is active:
- In SchoolDay Connect, select the application you want to apply the filter ruler to.
- Go to the Filter Rules tab .
- Check that your new rule appears in the list with the correct entity type and conditions.
- Trigger a manual sync or wait for the next scheduled sync.
- Go to Sync Status and review the record counts — the number of synced records should reflect the filtered subset.
Troubleshooting
|
Symptom |
Applies to |
Likely cause |
Fix |
|---|---|---|---|
|
All records still sync after saving |
Import and export |
Done was clicked but not Save |
Re-open Filter Rules, confirm the rule appears, and click Save |
|
More records than expected are syncing |
Import and export |
Multiple rules are active — each adds records via OR logic |
Review all active rules in the Filter Rules tab and remove any that are too broad |
|
Linked records are missing |
Import and export |
Include linked was not enabled for the related entity |
Edit the rule and enable the relevant linked entity types |
|
A needed attribute is not in templates |
Import and export |
The attribute requires a custom filter |
Select Custom Filter by... in step 6 and enter the attribute manually |
|
Vendor reports missing records |
Export only |
Filter value does not match SIS data exactly |
Review the Attribute, Condition, and Value fields. Values are case-sensitive — check for typos, spacing, or capitalization differences |